
How to Use a Telescope: A First-Night Walkthrough
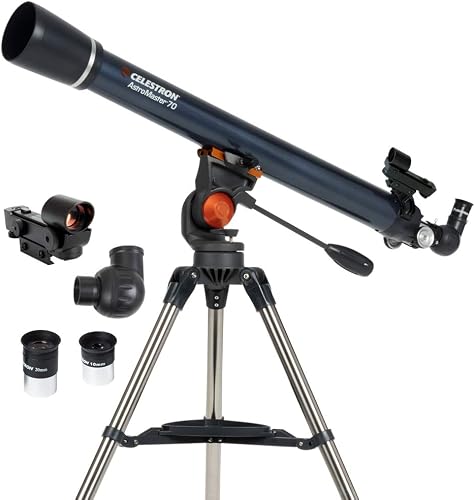
EyepieceLab is reader-supported. If you buy through our links we may earn a commission at no extra cost to you. As an Amazon Associate we earn from qualifying purchases. Disclosure.
Quick answerLine up the finder on a distant object in daylight (never the Sun). At night, set the scope out early to cool, use a red light, put in your lowest-power eyepiece, aim with the finder, center the target, focus, and only then try more magnification. Start with the Moon. Give your eyes 20 to 40 minutes to dark-adapt (NPS).
Most first nights go wrong for boring reasons: a finder that isn't lined up, too much magnification, or a scope that's still warm from the house. Here's how to avoid all three, step by step, with sources from Celestron, Tele Vue, NASA and the National Park Service.
Before dark
- Assemble it indoors once. Learn where the knobs and locks are while you can see them.
- Align the finder in daylight. Point the telescope at something far away, like a treetop or a distant pole, and center it in your lowest-power eyepiece. Then adjust the finder until its dot or crosshair sits on the same spot. Never point at or near the Sun: NASA warns that viewing it through a telescope without a proper front-mounted solar filter "will instantly cause severe eye injury."
- Check what's up. NASA's monthly What's Up notes list the planets and events. NASA's skywatching FAQ says outer planets are best near opposition, when they're "visible all night."
At night
- Set the scope outside early. Celestron's glossary warns that using a telescope before it reaches outdoor temperature "can result in degraded image quality." Give it time.
- Protect your night vision. The NPS says dark adaptation takes "20 to 40 minutes," and a few seconds of bright light resets it. Use a dim red light, not your phone.
- Start with the lowest power. Put in the eyepiece with the biggest number (like 25 mm). Tele Vue: "To achieve low magnification, use long-focal-length eyepieces." The wide view makes finding things much easier.
- Aim with the finder, center, focus. Turn the focuser slowly until stars are sharp points.
- Then increase power. Swap to a shorter eyepiece. If the view gets mushy, step back down. Celestron says too much magnification on a poor night "will only magnify the turbulence in the atmosphere."
- Use averted vision on faint things. The NPS describes looking slightly to the side so faint objects "pop into view."
Good first targets
- The Moon: bright and easy. A Moon filter helps near full.
- Jupiter: NASA says small telescopes show its four Galilean moons and cloud bands.
- Saturn: NASA's FAQ says a small telescope can show its rings; binoculars likely won't.
- The Pleiades and Orion Nebula: low power shows them best.
More in what you can see with a telescope.
Gear that helps
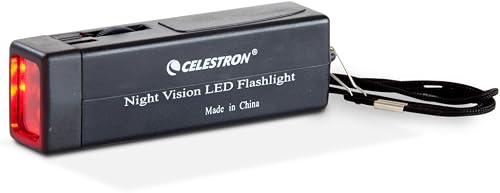
Red flashlight
Celestron Night Vision Red LED Flashlight
- Two red LEDs, per the listing
- Thumbwheel brightness control
- Runs on an included 9V battery
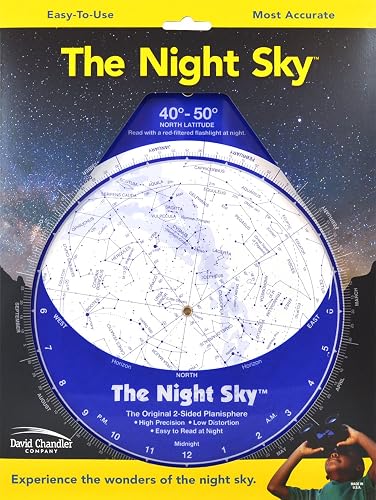
Planisphere
The Night Sky 40°-50° Star Finder (Small)
- Rotating planisphere by David Chandler, per the description
- Shows visible constellations for any date and time
- For 40-50° north latitude
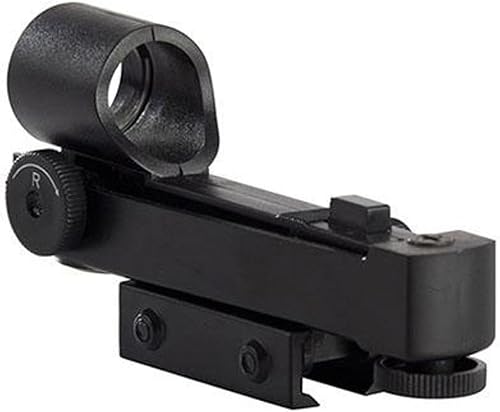
Red dot finder
Celestron StarPointer Red Dot Finder
- Red dot 'point and look' finder, per the listing
- Right-side-up view; adjustable dot brightness
- Mounting base and CR2032 battery included
See astronomy accessories. If your reflector's stars look like comets even when focused, it probably needs collimation.
FAQ
Which eyepiece first?
The longest focal length, for the lowest power.
Why is it blurry?
Cooling, turbulence, too much power or collimation.
How long to dark-adapt?
20 to 40 minutes, per the NPS.